
Last updated on May 10th, 2023 at 10:23 am
Bird feeder cameras are a great way to get an up-close look at the birds you know and love. Thankfully, setting one up is fairly simple once you’ve purchased a suitable camera.
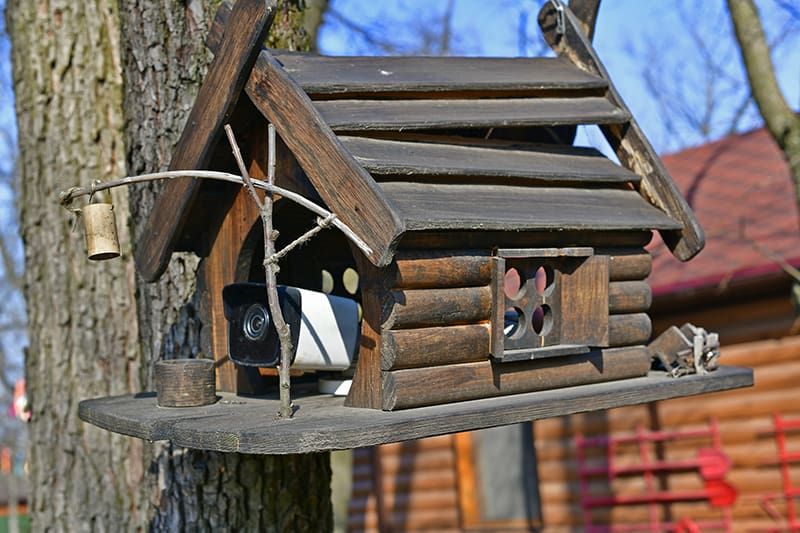
Before we begin, it is important to point out that there are now modern bird feeders with built-in cameras.
Here’s how to attach a camera to a bird feeder in 7 steps:
1. Pick a High-Quality, Durable Camera
Perhaps the most important part of setting up a bird feeder camera is choosing the right camera to begin with.
You’ll need the camera to be lightweight, easy to mount, yet durable and waterproof.
The camera also needs to be able to pick up fine detail and quick movements.
A GoPro Hero10, available on Amazon, is an excellent option for a bird feeder camera.
The GoPro is completely waterproof and nearly indestructible, so it should handle the time outside and a potential drop from high heights.
It allows you to shoot 1080p video at 60 fps, bringing high definition to your bird footage.
It can be used as close as 12” from the feeder without getting blurry.
The GoPro may fog during wet conditions, but Amazon offers anti-fog inserts like the FitStill Humidity Removing Defogger.
These absorb extra moisture and allow you to get a clear picture in all conditions.
Every GoPro comes with access to a mobile application to track and view your footage, which is a major benefit of the GoPro over other cameras.
However, they are battery-powered, which means that you’ll need to set up and take down your GoPro between recording sessions to preserve battery life.
The Soliom S90 Pro Outdoor Solar Camera, also available on Amazon, is an option that charges itself in the sun.
This way, it can be permanently mounted without needing to come down for battery replacements.
This camera is completely wireless, with WiFi capabilities.
The Soliom S90 Outdoor Solar Camera needs 3-5 hours of direct sunlight each day and needs to be at least 8’ from the ground.
Keep this in mind when you’re setting up your feeder and camera.
This camera, like the GoPro, can connect to your mobile device.
It can take and send 1080p video, and you can choose a motion-activation setting that starts recording and sends a mobile alert when it notices movement.
This feature makes it a great option for a security camera, should you ever want to repurpose it.
2. Figure Out Your Needs For Internet Access and Power
Some cameras benefit from running on batteries, solar power, and WiFi, which means that you won’t need to worry about setting up wires for Internet access or power.
However, if you have a camera that does require wires, make sure that you plan accordingly.
Then determine where and how those wires will run to be as unobtrusive as possible.
If you’re relying on a WiFi connection, make sure your feeder camera is positioned close enough to your router to be able to get a strong enough signal.
3. Decide What Angle You Want
Depending on whether or not your bird feeder is already set up, you may have some options as to what angle you want to capture from your camera.
Bird behavior is not always easy to predict, but you can at least make sure that you capture some bird activity by pointing your camera at known feeding perches.
Consider setting up your feeder first, watching to see where and how the bird activity comes to it, and then setting up your camera after the fact.
4. Draw Up a Blueprint of Your Plan
Before you get started mounting your camera, make sure that you have a plan that works.
Draw up a blueprint for yourself that shows exactly:
- What you’re going to use.
- Where it will go.
- What it will mean for the birds in your yard.
You want the camera to be unobtrusive, and a good way to do that is to look ahead of time at where it will mount and make sure that it’s not in the way.
Drawing up a blueprint is also a major advantage if you need to run any wiring, as this takes a considerable amount of forethought and planning.
5. Mount Your Camera and Equipment
Depending on which camera you purchase, you may have several options for how you want to mount your camera.
Some cameras, like the GoPro, offer a magic arm mount like this SFN 11-inch Adjustable Mount on Amazon.
This mount allows you to attach the camera to anything sturdy, including the feeder or feeder pole.
Another option is to use a tripod mount, which can’t attach directly to the feeder but can be a good option for recording birds on the ground.
You’ll also need to figure out how to mount or run your wiring if you want to attach your camera to a power source.
Some cameras are solar-charged or battery-operated and don’t need wiring, but in many cases, you’ll need to figure out how to plug in your camera.
This way, it can sit outside filming for long periods.
You may also need to run wiring for an ethernet cable if you want to deploy your footage online somewhere.
However, many cameras have WiFi capabilities and allow you to remotely access footage as long as you’re within a reasonable range.
6. Access Your Footage
Many wildlife cameras now come with WiFi capabilities so that they can transfer footage without being physically connected to your computer or phone.
Some even have a mobile application that stores all of the footage.
However, if your camera does not have this, accessing your footage is still as simple as transferring data from an SD card to another device.
7. (Optional) Stream Your Footage on YouTube
In addition to accessing your footage, you may be able to stream footage directly to YouTube.
YouTube Live is a free service that you can access with a verified YouTube account.
It allows you to stream directly from a mobile device or a webcam.
If you’re using a GoPro, this streaming service is as simple as clicking Control Your GoPro > Live > Set Up Live > YouTube.
It will also give you the options to stream on Twitch or Facebook.